Do you believe you need heavy weights or gym machines to build sculpted, toned shoulders? Think again.
Many still fall for the myth that shoulder definition comes only from bench pressing or endless sets of dumbbell raises.
But here’s the truth: your body weight, proper form, and consistent effort are more than enough to sculpt strong, lean shoulders — no fancy equipment required.
This 10-minute, no-weight shoulder sculpt challenge is designed to tone your delts, improve posture, and build functional upper-body strength using only your body.
Whether you’re at home, traveling, or just short on time, this routine gives your shoulders the burn they need — in just 10 minutes a day.
Table of Contents
Why Focus on Shoulder Sculpting Without Weights?
Your shoulders are involved in nearly every upper-body movement. Defined shoulders don’t just look good — they improve mobility, boost strength for daily tasks, and reduce the risk of injury.
Here’s what makes this challenge different:
- It targets all three heads of the deltoid (anterior, lateral, and posterior).
- It builds muscular endurance without stressing your joints.
- It uses high-tension, low-impact movements — perfect for all fitness levels.
- It improves posture and shoulder stability, especially for people who sit or use computers a lot.
Did you know? Studies show that isometric and time-under-tension exercises can trigger muscle growth even without added weights — just with smart movement and form.
The 10-Minute No-Weight Shoulder Sculpt Routine
Structure:
- Total Time: 10 Minutes
- Format: 40 seconds work / 20 seconds rest
- Equipment: None
- Optional: Yoga mat or towel
Warm-Up (1 Minute – Optional but Recommended)
- Arm circles (20 seconds forward, 20 seconds backward)
- Shoulder rolls (10 seconds front, 10 seconds back)
1. Shoulder Taps
Muscles Targeted: Front delts, stabilizers, core
How-To:
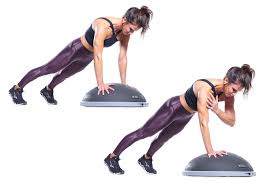
- Start in a plank position, shoulders stacked above wrists.
- Tap your left shoulder with your right hand, then your right shoulder with your left hand.
- Keep hips steady — no twisting.
Tip: Engage your core to protect your lower back and enhance stability.
2. Wall Angels
Muscles Targeted: Rear delts, traps, rotator cuff
How-To:
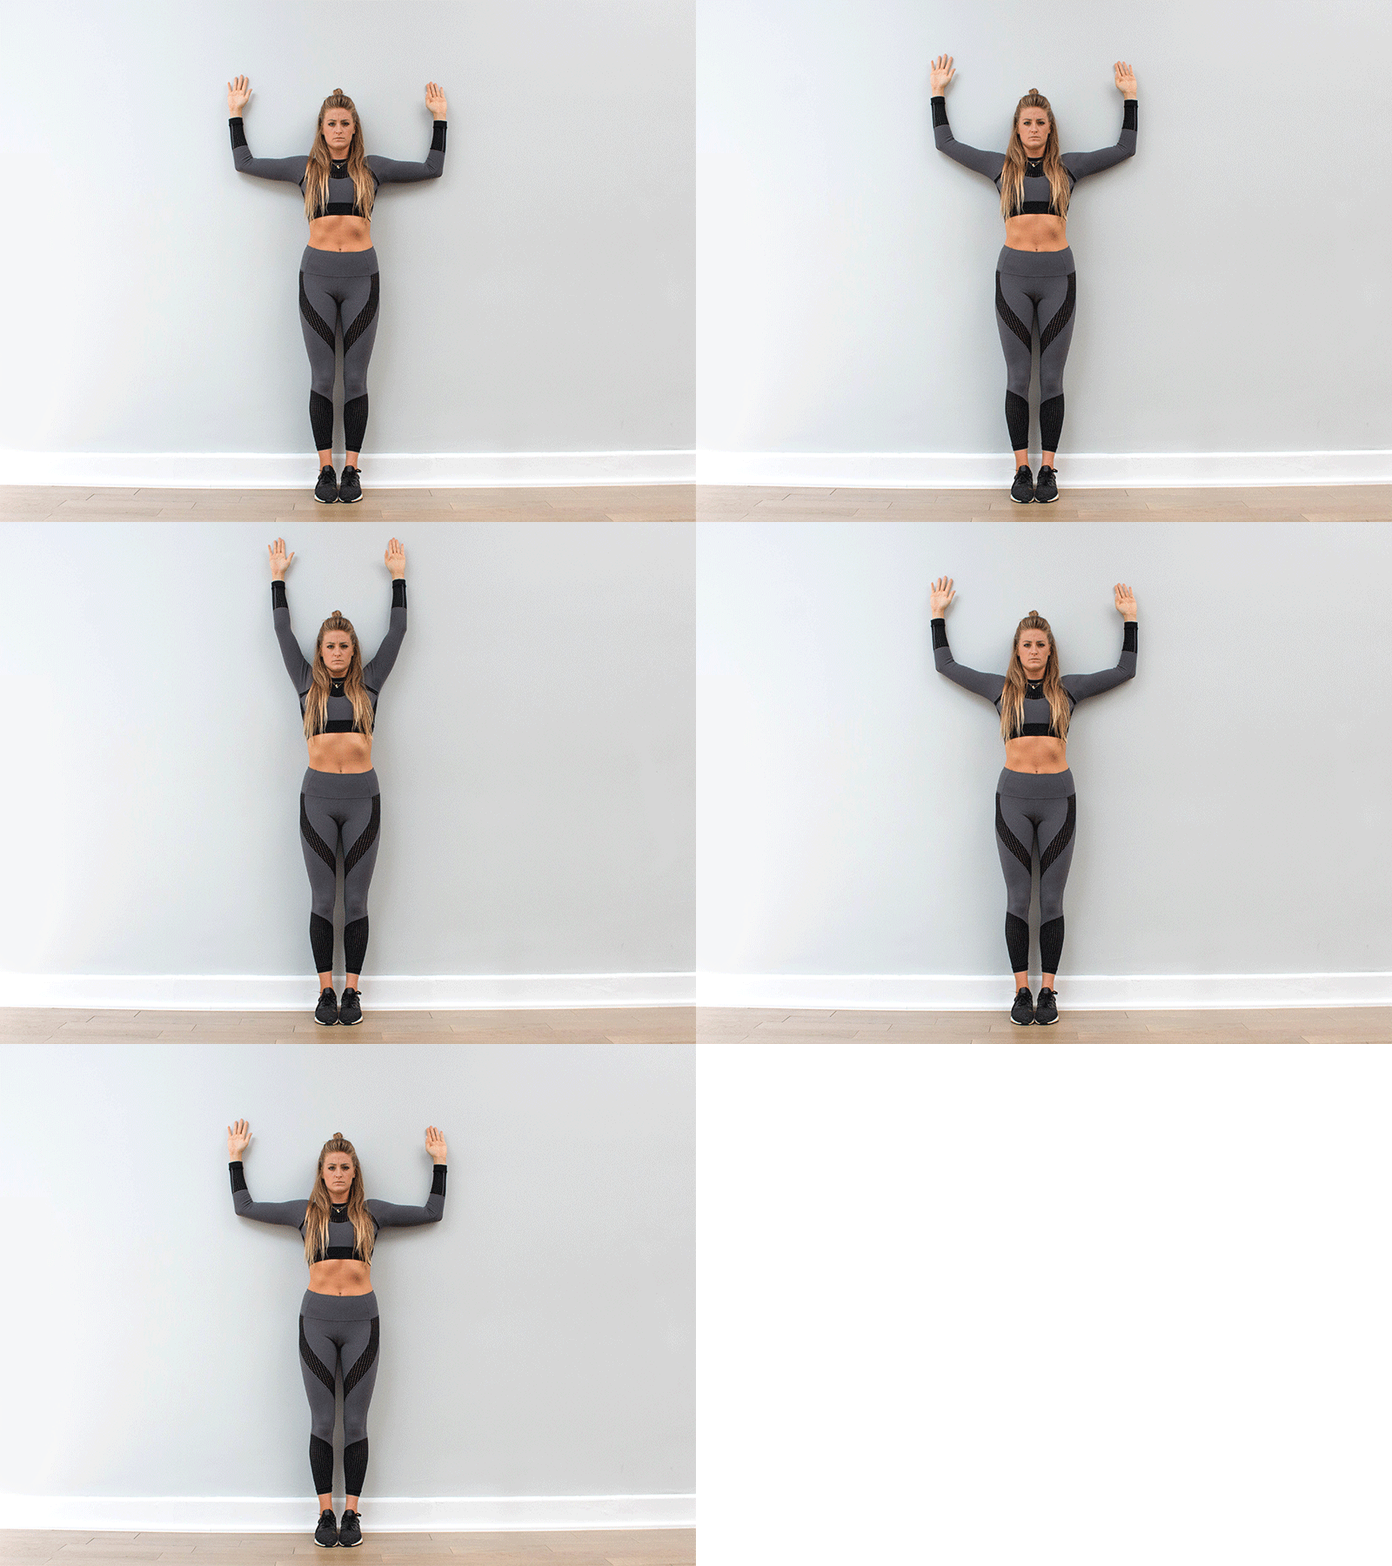
- Stand against a wall with your back, arms, and head touching the surface.
- Raise your arms into a goalpost position.
- Slowly raise and lower your arms like you’re making a snow angel.
Tip: Don’t let your lower back arch — keep your core tight.
3. Pike Push-Ups
Muscles Targeted: Front and lateral delts
How-To:

- Start in a downward dog position, hips raised high.
- Bend your elbows and lower your head toward the floor, then push back up.
Tip: Keep elbows slightly tucked and control the descent.
4. Arm Pulses (Lateral Raises)
Muscles Targeted: Lateral delts
How-To:
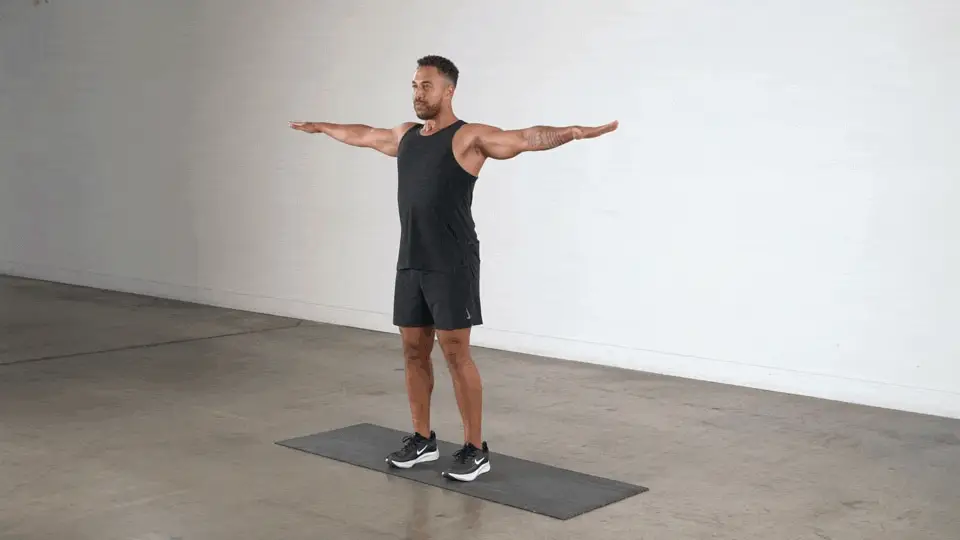
- Stand tall with arms extended sideways, shoulder height.
- Pulse your arms up and down 1–2 inches.
Tip: Maintain full tension — don’t let arms drop.
5. Reverse Tabletop Shoulder Squeeze
Muscles Targeted: Rear delts, traps
How-To:

- Sit with feet flat, hands behind you, fingers pointing forward.
- Lift hips into a reverse tabletop position.
- At the top, squeeze your shoulder blades together for 2–3 seconds.
Tip: Focus on engaging your upper back and shoulders at the top.
6. Plank to Downward Dog
Muscles Targeted: Delts, lats, triceps
How-To:
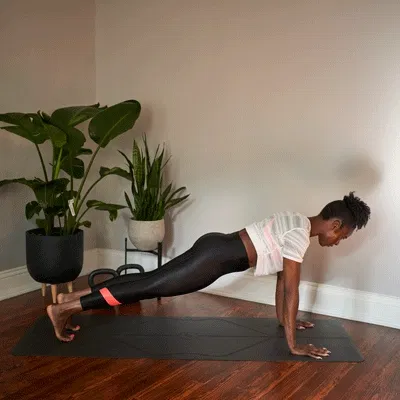
- Begin in a plank position.
- Push your hips back into a downward dog stretch.
- Return to plank and repeat.
Tip: Move with control — feel the shoulders work as you shift.
7. Y-Raises on Floor
Muscles Targeted: Rear delts, rotator cuff
How-To:
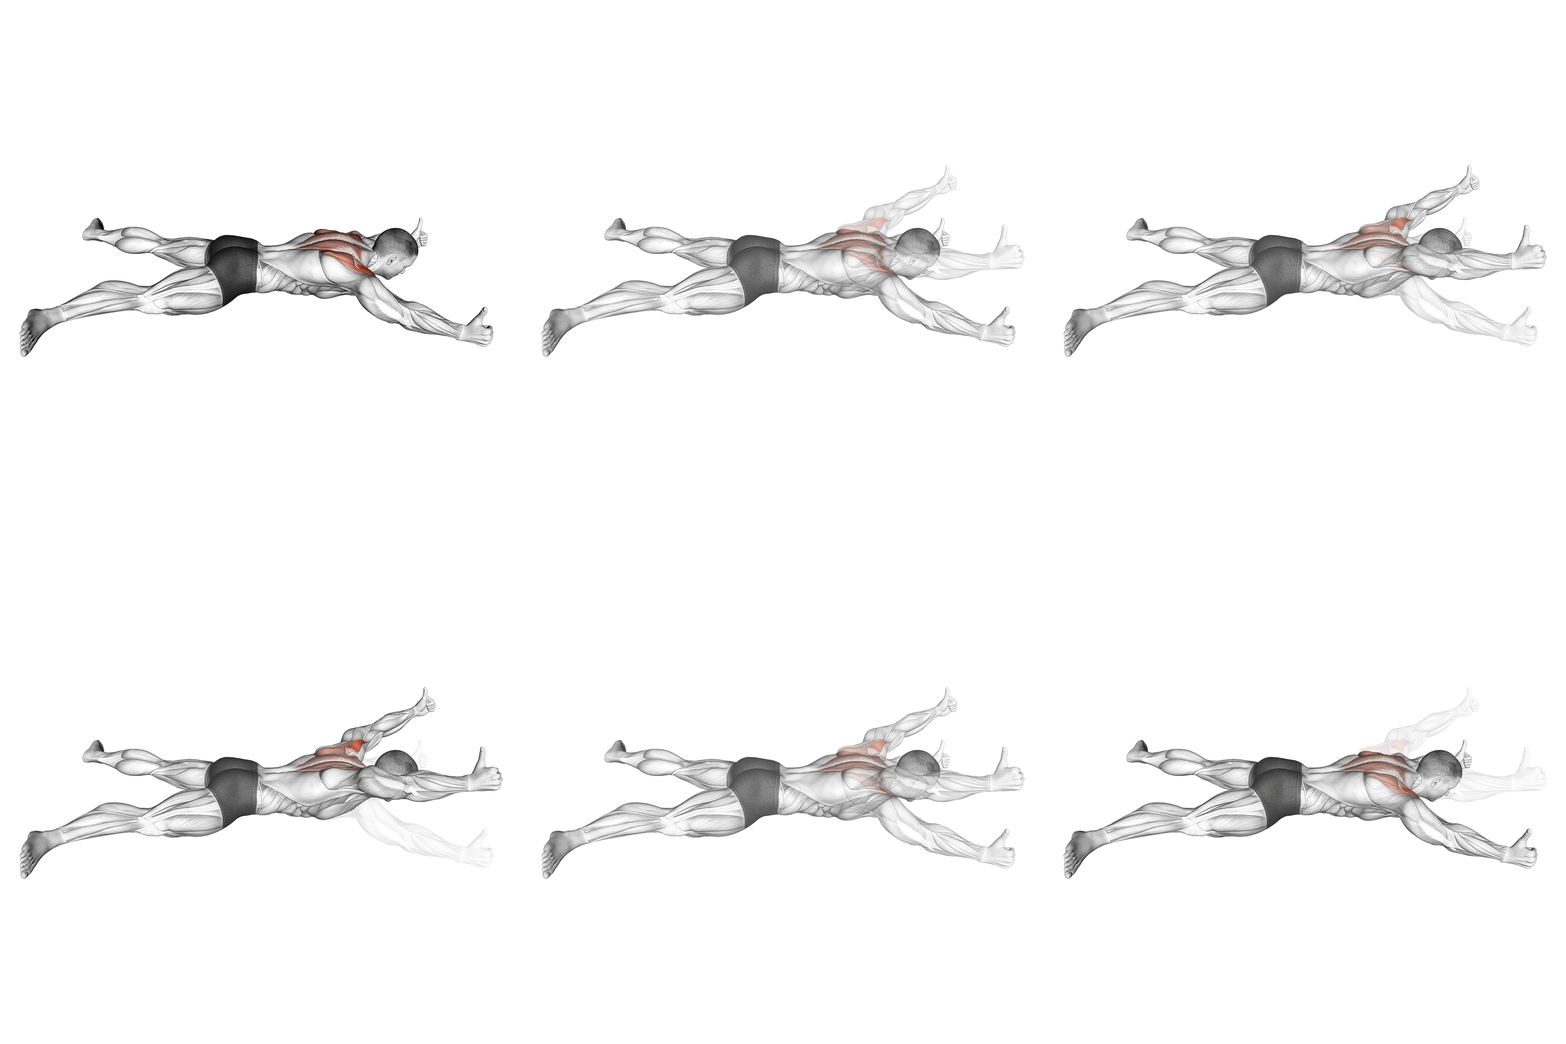
- Lie face down, arms overhead in a “Y” shape.
- Lift arms off the floor while keeping your neck neutral.
Tip: Focus on squeezing your upper back at the top.
8. Arm Circles Burnout
Muscles Targeted: All shoulder heads
How-To:
- Extend arms to the side, shoulder height.
- Make small circles forward for 20 seconds, then backward for 20 seconds.
Tip: Add intensity by increasing speed in the last 10 seconds.
Recovery & Care Tips: Keep Your Shoulders Healthy & Strong
Toning and sculpting your shoulders without weights may seem low-impact — but make no mistake, your muscles still work hard. Recovery is where real growth happens. Neglect it, and you risk soreness, stiffness, or even injury. Here’s how to support your shoulder health after every session:
1. Cool Down with Shoulder-Friendly Mobility
After the workout, take 3–5 minutes to slow your breathing and stretch. Focus on:
- Cross-body arm stretches (30 seconds each side)
- Shoulder rolls (10–15 reps)
- Thread-the-needle stretch (holds for 20–30 seconds)
These improve circulation, reduce post-workout tightness, and aid flexibility.
2. Hydration Matters More Than You Think
Muscles recover better when they’re well-hydrated. Dehydration slows muscle repair and increases the chance of cramping. Aim to drink water within 30 minutes post-exercise.
3. Apply Heat or Ice Based on Feel
- Feeling tight or sore? Try a warm compress or hot shower to loosen up the muscle fibers.
- Feeling inflamed or tender? Apply an ice pack for 10–15 minutes to reduce swelling.
Always listen to your body.
4. Take Rest Days – They’re Not Lazy Days
Don’t underestimate rest. Even with a 10-minute challenge, your shoulders need time to rebuild and strengthen.
Pro tip: Use active recovery days for light stretching, yoga, or a walk — not more shoulder work.
5. Add Magnesium to Your Diet
Magnesium supports muscle recovery and prevents cramps. You can get it from:
- Leafy greens (like spinach)
- Pumpkin seeds
- Almonds
- Or a natural magnesium supplement (after consulting with a professional)
6. Check Your Posture Daily
Poor posture can undo the gains from your workout and stress your shoulders. Practice:
- Keeping your shoulders slightly pulled back
- Ears aligned with shoulders when standing or sitting
- Taking frequent breaks from phones and computers
7. Use a Foam Roller or Massage Ball
For deeper relief, use a foam roller or massage ball to release tension in your traps, upper back, and rear delts. Spend 1–2 minutes on tight spots, especially after high-tension moves like pike push-ups.
8. Track Your Progress (Not Just Pain)
Keep a log of how your shoulders feel post-workout. Are they sore in a good way? Do you feel more stable? Noticing trends helps prevent overtraining and keeps you motivated.
Quick Signs You Need Extra Rest:
- Shoulder joint pain (not just muscle soreness)
- Clicking or grinding sensations
- Fatigue that doesn’t go away with a night’s sleep
- Sharp pain during daily movement
If any of these show up, pause your routine and allow more recovery time.
What to Expect After 30 Days of This Challenge
| Day 1–7 | Day 8–21 | Day 22–30 |
|---|---|---|
| Mild soreness and muscle awareness | Increased endurance and shoulder definition | Visible sculpting and better posture |
| Improved control & form | Enhanced shoulder mobility & range | Stronger, more stable upper body |
| Easier daily activities | Less shoulder fatigue in daily movement | Motivation to advance to harder moves |
Common Myths About Shoulder Workouts (Debunked)
| Myth | Reality |
|---|---|
| You must lift heavy to build shoulders | Time under tension and proper form are just as effective. |
| Only men should train shoulders | Shoulder training improves posture, reduces pain, and enhances physique for all. |
| Light bodyweight workouts don’t work | They do — if executed with focus and consistency. |
Do’s & Don’ts for Maximum Results
| Do | Don’t |
|---|---|
| Focus on form over speed | Don’t rush through reps — it kills the burn |
| Breathe consistently throughout movements | Don’t hold your breath |
| Stay consistent — even 10 mins a day matters | Don’t skip days just because it feels “too easy” |
| Engage your core to support your shoulders | Don’t let your back sag or arch |
Final Thoughts
This 10-minute shoulder sculpt challenge proves that you don’t need weights to get stronger, leaner, and more defined shoulders. All you need is commitment, the right technique, and your own body.
Whether you’re a beginner looking to get started or someone advanced needing a travel-friendly burn, this no-weight shoulder routine will challenge you in new ways.
Stay consistent for 30 days and you’ll see — definition without dumbbells is more than possible. It’s powerful.
Frequently Asked Questions (FAQs)
Can I build shoulder muscle without using weights?
Yes, you absolutely can. Bodyweight exercises that use time-under-tension, isometric holds, and dynamic movements (like pike push-ups or arm pulses) can activate and strengthen your shoulder muscles. With consistency, you can achieve tone and definition without any equipment.
How often should I do this 10-minute shoulder sculpt challenge?
You can do it 3 to 5 times per week, depending on your fitness level. Make sure to allow at least one rest day between intense sessions to let your muscles recover and rebuild.
Is this challenge suitable for beginners?
Yes, it’s beginner-friendly. The moves use body weight and low-impact mechanics, making them safe for most people. Focus on proper form and go at your own pace. You can modify any movement to make it easier (e.g., knee-supported plank for shoulder taps).
Will this challenge bulk up my shoulders?
No, this routine is designed to tone, define, and strengthen your shoulders — not bulk them up. Without added resistance like heavy weights, the emphasis is on sculpting lean muscle and improving shoulder endurance.
Can I combine this with other workouts?
Absolutely. This 10-minute routine works well as a warm-up, a finisher, or a standalone session. You can pair it with core, cardio, or lower-body training to create a full-body program.
What if I feel shoulder pain during the workout?
Mild muscle fatigue or “burn” is normal, but sharp or joint pain is not. If you feel discomfort, stop the movement immediately and assess your form. If pain persists, rest and consult a medical or fitness professional.
Do I need a mat or any special equipment?
No equipment is required. A yoga mat or soft surface can add comfort, especially for floor-based exercises like Y-raises or plank work, but it’s optional.
How long before I see results?
Results vary by individual, but many people notice improved posture, better shoulder mobility, and muscle tone within 2–4 weeks of consistent training and proper recovery. Visible definition typically appears after 4–6 weeks of dedicated effort.
Is it okay to do this every day?
Daily workouts are possible if you alternate intensity and listen to your body. However, it’s generally best to give your shoulder muscles at least one rest day between sessions for optimal recovery and progress.
Will this help with shoulder fat?
While you can’t spot-reduce fat, this routine strengthens the shoulder muscles, which improves tone and posture. Combined with a healthy diet and full-body activity, it can help reduce overall body fat — including around the shoulders.
