Strong, mobile shoulders aren’t just for athletes or fitness enthusiasts—they’re the foundation for nearly every upper-body movement you perform daily, from lifting groceries to pushing open a heavy door.
Unfortunately, shoulder weakness or stiffness is one of the most common causes of joint pain, poor posture, and reduced athletic performance.
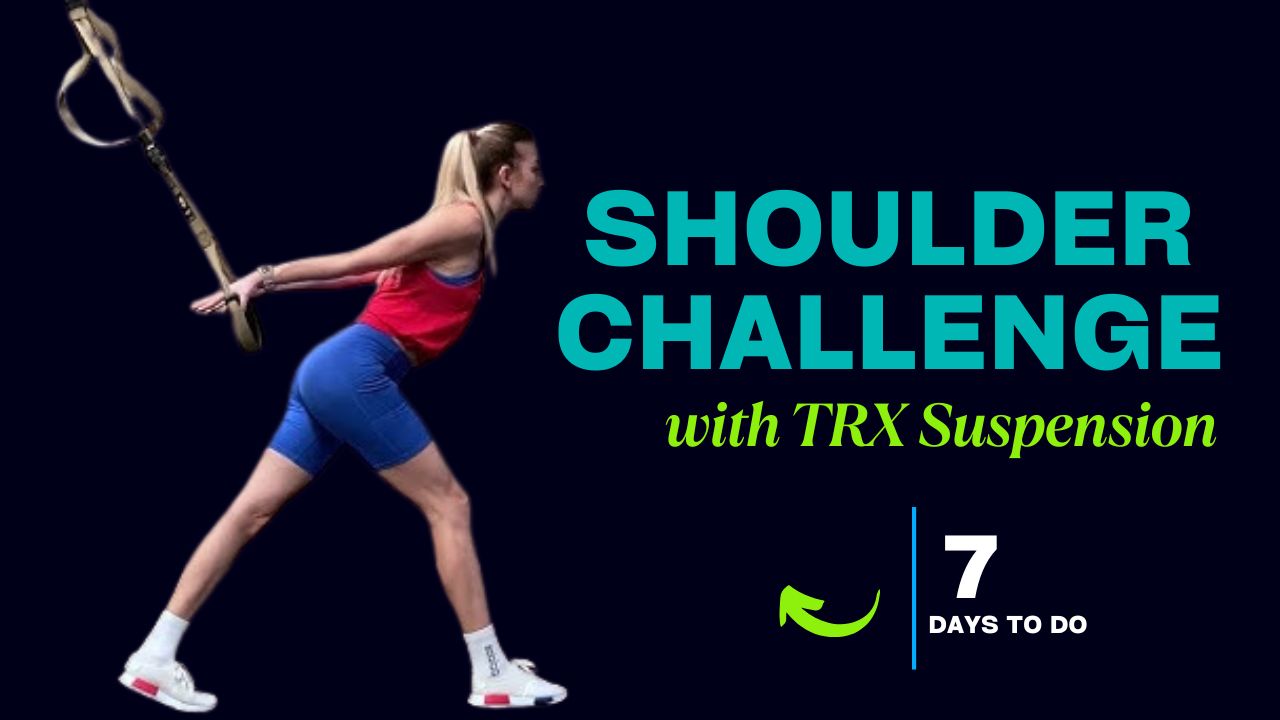
That’s where the TRX Suspension Trainer comes in. Unlike traditional weights, TRX uses your own body weight and gravity, offering joint-friendly, low-impact resistance that also engages stabilizing muscles.
This 7-day challenge is designed not just to build muscle but to improve joint stability, enhance mobility, and reduce injury risk—all in just one week.
Did You Know?
The shoulder joint (glenohumeral joint) has the greatest range of motion of any joint in the human body—but that also makes it the most unstable and prone to injury. Strengthening it with controlled, multi-angle exercises is key to long-term health.

Table of Contents
Why TRX Suspension for Shoulder Joint Strength?
- Joint-Friendly Resistance: TRX uses your body’s natural movement patterns, minimizing unnecessary strain.
- Full Range of Motion: Encourages stability through dynamic angles.
- Scalable Difficulty: Simply adjust your foot position to increase or decrease resistance.
- Engages Core Muscles: Every TRX move activates your core, improving posture and balance.
Shoulder Anatomy Overview (Quick Refresher)
Before diving into the exercises, understanding your shoulder’s structure will help you train smarter:
- Deltoids: The main shoulder muscles (anterior, lateral, and posterior fibers).
- Rotator Cuff: A group of 4 small muscles responsible for joint stability.
- Trapezius & Rhomboids: Support shoulder movement and posture.
- Serratus Anterior: Important for scapular mobility and health.
Myth Buster:
Many believe heavy weights are the only way to strengthen shoulders. In reality, controlled resistance (like TRX) can be more effective for functional strength and injury prevention.
What Can Happen After 30 Days of This TRX Shoulder Challenge
| Positive Changes | Possible Risks (if done incorrectly) |
|---|---|
| Noticeably stronger shoulder muscles. | Shoulder strain or injury from poor form. |
| Improved joint stability and rotator cuff strength. | Overuse soreness if you skip rest or recovery. |
| Better posture with reduced shoulder rounding. | Wrist or elbow discomfort from incorrect grip. |
| Increased range of motion and flexibility. | Lower back strain from improper core engagement. |
| Enhanced shoulder endurance for daily activities and sports. | Plateau in progress if you don’t increase challenge gradually. |
| Reduced shoulder discomfort in overhead movements. | Aggravation of pre-existing shoulder issues if ignored. |
| More balanced upper body strength and muscle tone. | Loss of motivation if workout variety is not introduced. |
Do & Don’t for TRX Shoulder Workouts
| Do | Don’t |
|---|---|
| Warm up your shoulders with mobility drills before starting. | Jump straight into exercises without warming up. |
| Maintain a neutral spine and engage your core during all moves. | Arch your lower back or hunch your shoulders forward. |
| Adjust your body angle to match your strength level. | Use an angle that’s too steep, causing poor form. |
| Move slowly and with control, especially during the lowering phase. | Use momentum to swing or jerk the straps. |
| Focus on full range of motion without forcing the joint. | Overextend or push through sharp pain. |
| Keep wrists neutral to reduce strain. | Bend or twist wrists unnecessarily. |
| Listen to your body and take rest if needed. | Train through fatigue that compromises form. |
| Secure the TRX anchor point before starting. | Use TRX on an unstable or unsafe anchor. |
The 7 TRX Shoulder Exercises (with How-To)
Below are the key moves you’ll perform in the 7-day challenge. Each includes a description and a step-by-step “How To” section.
1. TRX Y-Fly
Description:
Targets the upper traps, rear deltoids, and stabilizing muscles for posture improvement. The “Y” shape mimics a shoulder elevation pattern that strengthens rotator cuff and scapular stabilizers.
How To:
- Stand facing the TRX anchor point, feet shoulder-width apart.
- Hold the handles with palms facing down, arms extended forward.
- Lean back slightly, keeping your body in a straight plank line.
- Pull your arms upward into a wide “Y” shape, squeezing shoulder blades together.
- Lower back with control.
Tip: Keep your ribs down and avoid arching your lower back.
2. TRX Reverse Fly
Description:
Strengthens rear delts and improves scapular retraction for better shoulder health.
How To:
- Face the TRX anchor with a slight lean backward.
- Start with arms extended in front, palms facing each other.
- Open arms out to the sides until they’re level with your shoulders.
- Slowly return to starting position.
Tip: Keep elbows soft—not locked—throughout the movement.
3. TRX Face Pull
Description:
Targets rear deltoids, traps, and external rotators—great for posture correction.
How To:
- Grab TRX handles with palms facing in, arms extended toward the anchor.
- Lean back to create tension.
- Pull handles toward your face, elbows flaring out at 90 degrees.
- Return to start with control.
Tip: Focus on leading with your elbows, not your hands.
4. TRX Shoulder Press (Inverted)
Description:
A bodyweight-friendly version of the overhead press, engaging shoulders without heavy weights.
How To:
- Face away from the anchor, holding TRX handles at shoulder height.
- Stagger feet for stability.
- Push arms upward to extend fully overhead.
- Slowly bring back to starting position.
Tip: Engage your core to prevent leaning forward.
5. TRX High Row
Description:
Strengthens the traps, rhomboids, and rear delts while improving upper-body pulling strength.
How To:
- Face the anchor with TRX handles in hand, palms facing down.
- Lean back until arms are extended.
- Pull handles toward your upper chest, elbows high.
- Return slowly.
Tip: Keep wrists neutral to avoid unnecessary strain.
6. TRX T-Fly
Description:
Builds posterior chain shoulder stability and opens up tight chest muscles.
How To:
- Face the anchor, arms extended in front with palms down.
- Lean back slightly.
- Open arms straight out to the sides into a “T” position.
- Return slowly.
Tip: Squeeze shoulder blades together at the top for maximum benefit.
7. TRX Rotator Cuff External Rotation
Description:
Specifically targets the rotator cuff, crucial for joint protection.
How To:
- Stand side-on to the anchor with the TRX handle in your outside hand.
- Elbow bent at 90 degrees, tucked close to your body.
- Rotate your arm outward while maintaining elbow position.
- Slowly return to start.
Tip: This is a small movement—don’t force a large range.
Training Guidelines Before You Start
- Warm-Up (5–8 minutes): Arm circles, band pull-aparts, scapular wall slides.
- Form First: Quality over quantity—poor form can strain the shoulders.
- Breathing: Exhale during the pull/press phase, inhale during return.
- Adjust Difficulty: The more you lean, the harder it gets.
Interesting Fact:
The TRX system was invented by a Navy SEAL to maintain strength in confined spaces—proving that bodyweight training can rival any gym setup.
7-Day Shoulder Challenge Schedule
Duration: 7 Days
Format: Perform each exercise in the listed order. Rest 30–45 seconds between sets.
| Day | Exercise | Sets | Reps/Time | Focus |
|---|---|---|---|---|
| 1 | TRX Y-Fly | 3 | 12–15 | Upper trap & posture |
| TRX Reverse Fly | 3 | 12–15 | Rear delts | |
| TRX Face Pull | 3 | 10–12 | Rotator cuff & traps | |
| 2 | TRX Shoulder Press | 3 | 10–12 | Overhead strength |
| TRX High Row | 3 | 12–15 | Pulling strength | |
| TRX T-Fly | 3 | 12–15 | Scapular stability | |
| 3 | TRX Rotator Cuff External Rotation | 3 | 12–15 each side | Joint stability |
| TRX Reverse Fly | 3 | 12–15 | Rear delts | |
| TRX Face Pull | 3 | 10–12 | Posture | |
| 4 | Repeat Day 1 | — | — | — |
| 5 | Repeat Day 2 | — | — | — |
| 6 | Repeat Day 3 | — | — | — |
| 7 | All exercises (circuit) | 2 | 10 each | Full shoulder workout |
Recovery and Mobility Tips for Healthy Shoulders
- Post-Workout Stretching: Doorway pec stretch, cross-body shoulder stretch, wall angels.
- Foam Rolling: Target upper back and lats to improve mobility.
- Daily Posture Checks: Keep ears aligned over shoulders to avoid forward head posture.
Signs Your Shoulder Joints Are Getting Stronger
- Reduced stiffness and soreness.
- Improved range of motion.
- Better posture and alignment.
- Increased endurance in daily activities.
Conclusion
Stronger, healthier shoulders aren’t built by accident—they come from consistent, targeted, and joint-friendly training.
The 7-Day Shoulder Challenge with TRX Suspension is more than just a workout plan; it’s a structured approach to improving joint stability, building functional strength, and enhancing mobility without the wear and tear of heavy lifting.
In just a week, you’ll start to feel greater control and strength in your upper body, and if you stick with it for 30 days or more, the results will extend beyond the gym—better posture, reduced risk of injury, and more confidence in everything from sports performance to everyday tasks.
The key is consistency, correct form, and listening to your body. Adjust the challenge to your fitness level, focus on smooth, controlled movements, and remember that strong shoulders are the foundation of a strong upper body.
Frequently Asked Questions (FAQs)
Can beginners do this TRX shoulder challenge?
Yes. The TRX is highly adjustable—just change your body angle to make the exercises easier. Beginners should start with a smaller lean and focus on form before increasing resistance.
How long should each workout take?
Each session in this 7-day challenge should take around 20–30 minutes, including warm-up and cool-down.
Do I need any additional equipment besides the TRX?
No. A TRX Suspension Trainer and a sturdy anchor point are all you need. However, having a mat for floor stretches can make recovery more comfortable.
Can TRX exercises really strengthen shoulder joints?
Yes. TRX training builds the muscles that stabilize the shoulder, especially the rotator cuff, traps, and rear delts, which are essential for joint health and injury prevention.
Should I rest during the 7-day challenge?
The program is structured for daily training, but if you experience significant soreness or fatigue, take a rest day to allow for recovery.
Is TRX safe for people with shoulder pain?
It can be, but you should consult a healthcare professional first. If cleared, start with lighter angles and avoid any movement that causes pain.
Can I repeat this challenge after 7 days?
Absolutely. Many people repeat it for 3–4 weeks, gradually increasing resistance or adding reps to keep progressing.
Will TRX shoulder workouts also improve posture?
Yes. Strengthening your upper back, traps, and rear delts can help pull your shoulders back, improving posture and reducing forward slouching.
Can I combine this challenge with other workouts?
Yes. Just avoid overtraining your shoulders on consecutive days. Pair it with lower body or core workouts for a balanced routine.
What if I don’t have a TRX?
You can substitute some moves with resistance bands or light dumbbells, but you won’t get the same suspension-based stability training benefits.