When it comes to fat loss, most people rush toward high-intensity cardio or endless crunches. But here’s the truth: a strong, mobile back can accelerate your calorie burn, improve posture, and prevent injuries that hold you back from training consistently. The surprising tool that can help you get there? A foam roller.
Often underestimated as “just” a recovery tool, the foam roller can double as a resistance and mobility trainer. In just 20 minutes a day, you can sculpt a leaner, stronger back while triggering full-body fat loss through increased muscle activation and calorie expenditure.
Did you know? Training larger muscle groups like your back can burn more calories at rest compared to smaller muscles because they demand more energy to maintain.
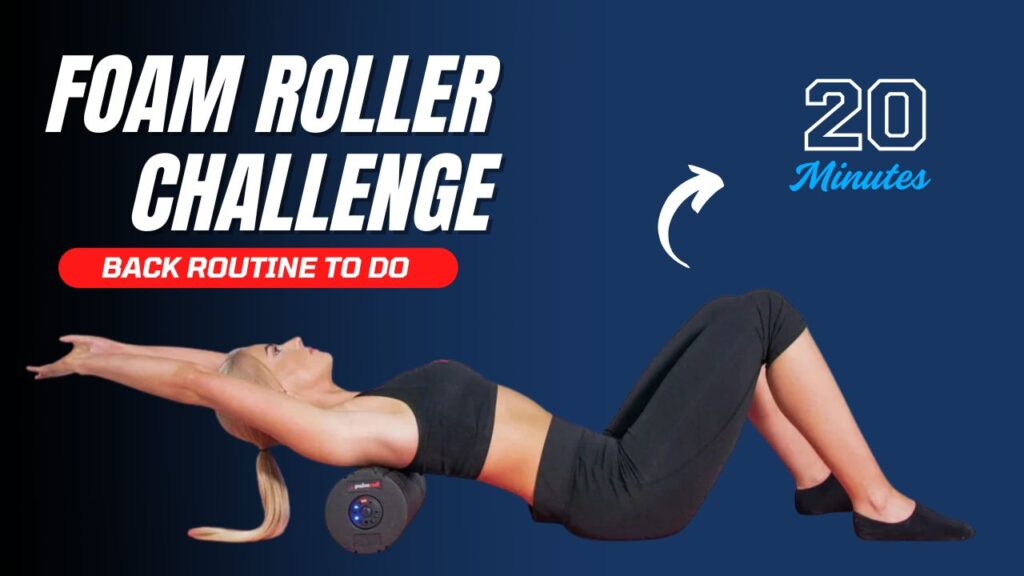
Table of Contents
Why Use a Foam Roller for Back Workouts?
Foam rollers aren’t just for post-workout massage—they can:
- Activate underused muscles in the upper, mid, and lower back
- Improve posture by opening up tight chest and shoulder areas
- Enhance range of motion, making fat-burning exercises more efficient
- Provide instability, which challenges your core and burns more calories
Myths About Back Training and Fat Loss
Myth 1: “You can spot-reduce fat from your back.”
Truth: You can’t choose where fat burns first. However, strengthening and toning the back can improve muscle definition so results are more visible once overall body fat decreases.
Myth 2: “Foam rollers are only for stretching.”
Truth: With the right moves, foam rollers can create resistance, instability, and muscle engagement similar to light weights.
Myth 3: “You need heavy weights to build a strong back.”
Truth: Bodyweight and foam roller exercises, done with control and intensity, can still stimulate muscle growth and strength.
What Can Happen After 30 Days of the Foam Roller Back Routine
| Potential Benefits | Explanation |
|---|---|
| Improved posture | Strengthening upper and mid-back muscles helps you stand taller and reduce slouching. |
| Increased back strength | Consistent engagement of lats, traps, and erector spinae boosts functional strength. |
| Better flexibility & mobility | Foam rolling and stretching improve range of motion in the shoulders and spine. |
| Reduced muscle tightness | Regular release of tension can decrease stiffness and discomfort in the back. |
| Enhanced calorie burn | Stronger muscles boost metabolism, aiding in overall fat loss. |
| Lower risk of injury | Improved stability and core engagement help protect your spine during daily activities. |
| Noticeable muscle tone | With proper nutrition, you may see a leaner, more defined back. |
Do’s and Don’ts for the 20-Minute Foam Roller Back Routine
| Do’s | Don’ts |
|---|---|
| Warm up your muscles with 3–5 minutes of light movement before starting. | Don’t skip warm-up and jump straight into intense moves. |
| Maintain slow, controlled movements for maximum muscle activation. | Don’t rush through reps, as it reduces effectiveness and increases injury risk. |
| Keep your core engaged throughout to protect your spine. | Don’t let your lower back arch excessively during exercises. |
| Breathe steadily—exhale during exertion, inhale during return. | Don’t hold your breath, as it can cause unnecessary strain. |
| Use a foam roller with the right density for your comfort level. | Don’t use an overly hard roller if you’re a beginner—it can cause discomfort. |
| Modify exercises if you feel pain (other than mild muscle fatigue). | Don’t push through sharp pain or joint discomfort. |
| Stay consistent with the routine for lasting results. | Don’t expect significant fat loss from a single session. |
The Exercises: Description + How-To
Below are 10 foam roller back exercises. Each includes a short description of why it’s effective and a step-by-step “How to” guide.
1. Foam Roller Lat Roll & Squeeze
Description: Targets the latissimus dorsi (lats) while improving mobility. This releases tightness and activates the muscles for better calorie-burning during strength work.
How to:
- Lie on your right side with the foam roller under your armpit.
- Extend your right arm overhead, palm facing up.
- Slowly roll from your armpit down to mid-ribcage.
- Pause on tight spots for 20–30 seconds.
- Repeat on the other side.
2. Prone Foam Roller Pull-Ins
Description: Works the lats, rhomboids, and erector spinae while engaging the core.
How to:
- Lie face down with arms extended forward, hands gripping the foam roller.
- Engage your back muscles to pull the roller toward your chest.
- Extend back to the start.
- Keep movements slow and controlled, 12–15 reps.
3. Seated Foam Roller Back Extension
Description: Improves spinal mobility while strengthening postural muscles.
How to:
- Sit on the floor with knees bent and foam roller behind your lower back.
- Lean back over the roller, opening your chest.
- Return to upright posture without rounding forward.
- Perform 12–15 reps.
4. Reverse Plank with Foam Roller Support
Description: Works the lower back, glutes, and hamstrings while improving stability.
How to:
- Sit with legs straight, heels resting on the foam roller.
- Place hands behind you, fingers pointing toward your hips.
- Lift your hips until your body forms a straight line.
- Hold for 20–30 seconds, lower slowly. Repeat 3–4 times.
5. Foam Roller Superman Pull
Description: Enhances upper back strength and posture.
How to:
- Lie face down, foam roller under your chest, arms extended forward.
- Lift your chest slightly, then pull the roller toward you while squeezing shoulder blades.
- Extend arms forward again.
- Perform 10–12 reps.
6. Kneeling Foam Roller Chest Opener to Back Squeeze
Description: Combines chest stretching with back activation, great for posture correction.
How to:
- Kneel with the foam roller in front of you.
- Place forearms on the roller and roll it forward while pushing chest toward the floor.
- Roll back toward you, engaging upper back muscles.
- Perform 12–15 reps.
7. Standing Foam Roller Front Press with Back Retraction
Description: Builds upper back and shoulder strength while engaging core stability.
How to:
- Hold the foam roller vertically in front of your chest.
- Press it forward, keeping arms straight.
- Pull it back toward your chest, squeezing shoulder blades.
- Repeat 12–15 reps.
8. Bird Dog Roll-Out
Description: Targets lower back stability and core strength while adding balance challenge.
How to:
- Begin on hands and knees with the foam roller under one hand.
- Extend opposite leg straight behind you while rolling the foam roller forward.
- Return to start. Switch sides after 10–12 reps.
9. Foam Roller Reverse Snow Angels
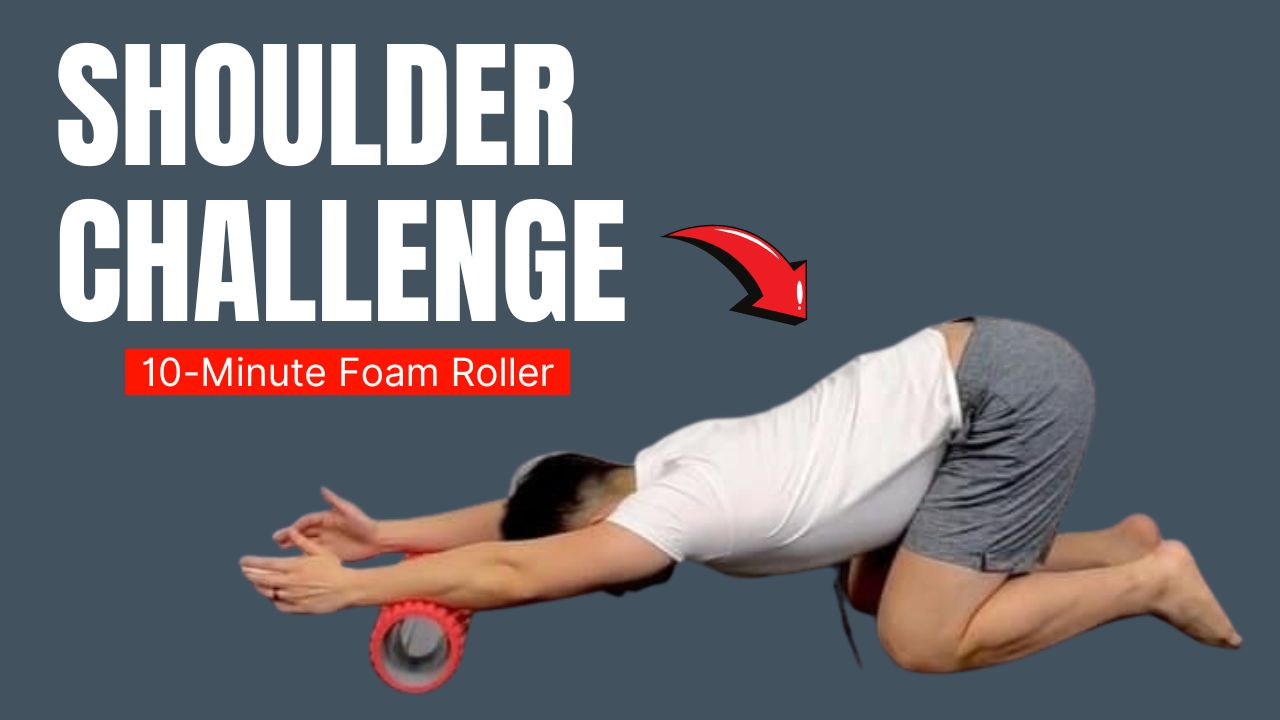
Description: Strengthens rear delts and upper back while improving shoulder mobility.
How to:
- Lie face down with foam roller under your forehead for support.
- Extend arms overhead, then sweep them out to the sides and down toward hips.
- Keep chest slightly lifted throughout.
- Perform 10–12 reps.
10. Glute Bridge with Foam Roller Squeeze
Description: Engages the lower back, glutes, and hamstrings, boosting calorie burn.
How to:
- Lie on your back, knees bent, foam roller between your thighs.
- Squeeze the roller while lifting hips toward the ceiling.
- Lower slowly.
- Perform 12–15 reps.
The 20-Minute Back Routine Challenge
Below is your complete workout plan. Perform the exercises in circuit style—move from one to the next with minimal rest. Complete 2–3 rounds.
| Exercise | Duration / Reps | Rest |
|---|---|---|
| Lat Roll & Squeeze | 30 sec per side | 10 sec |
| Prone Foam Roller Pull-Ins | 12–15 reps | 15 sec |
| Seated Back Extension | 12–15 reps | 15 sec |
| Reverse Plank | 20–30 sec hold | 10 sec |
| Foam Roller Superman Pull | 10–12 reps | 15 sec |
| Kneeling Chest Opener to Back Squeeze | 12–15 reps | 15 sec |
| Standing Front Press with Back Retraction | 12–15 reps | 15 sec |
| Bird Dog Roll-Out | 10–12 reps each side | 15 sec |
| Reverse Snow Angels | 10–12 reps | 15 sec |
| Glute Bridge with Foam Roller Squeeze | 12–15 reps | 15 sec |
Total Time: ~20 minutes (including rest)
Frequency: 3–4 times per week
Extra Tips to Maximize Fat Loss with This Routine
- Increase intensity gradually: Add a slight pause at the hardest part of each rep for better muscle activation.
- Pair with compound exercises: On other days, do squats, lunges, or push-ups for overall calorie burn.
- Stay consistent: Results come from weeks of practice, not one session.
- Mind your diet: Even the best workout can’t out-train poor eating habits.
Conclusion
A foam roller might seem like a humble piece of equipment, but when used strategically, it can transform your back training and accelerate your fat loss journey.
This 20-minute back routine challenge combines mobility work, muscle activation, and strength-building moves that not only sculpt a stronger back but also boost calorie burn throughout the day.
Remember, fat loss is the result of consistent training, proper nutrition, and recovery. By committing to this routine just a few times a week, you’ll improve posture, enhance performance in other workouts, and reduce the risk of injury—allowing you to train harder and longer.
So, roll out your mat, grab your foam roller, and give your back the attention it deserves. The results will speak for themselves.
Frequently Asked Questions (FAQs)
Can a foam roller really help with fat loss?
Yes, indirectly. Foam roller workouts can activate large muscle groups like the back, which boosts calorie burn. Combined with proper nutrition and regular exercise, it can support fat loss.
How often should I do this 20-minute back routine?
For best results, perform the routine 3–4 times per week, allowing at least one rest day in between sessions to let muscles recover.
Do I need a specific type of foam roller for this workout?
A medium-density foam roller works for most people. If you’re a beginner, a softer roller may be more comfortable. More advanced users can try a textured roller for added intensity.
Will this routine build muscle or just burn calories?
It can do both. While it’s not as heavy as traditional weightlifting, the resistance and stability challenges help strengthen and tone back muscles, which also increases calorie expenditure.
Is this workout safe for beginners?
Yes, most moves are low-impact and adjustable. However, if you have back pain or a history of injury, consult a healthcare professional before starting.
Can I combine this with other workouts?
Absolutely. You can pair it with lower-body training, cardio, or core workouts to create a balanced full-body fitness plan.
How soon will I see results?
This depends on your diet, overall activity, and consistency. Many people notice improved posture and less back tightness within 2–3 weeks, with visible toning in 6–8 weeks.