If you’ve been stretching, squatting, and strengthening but still struggle with balance, tight hips, or even frequent ankle rolls — your abductors might be the missing piece.
These often-overlooked muscles, located on the outer sides of your hips and thighs, play a crucial role in maintaining balance, proper posture, and joint alignment.
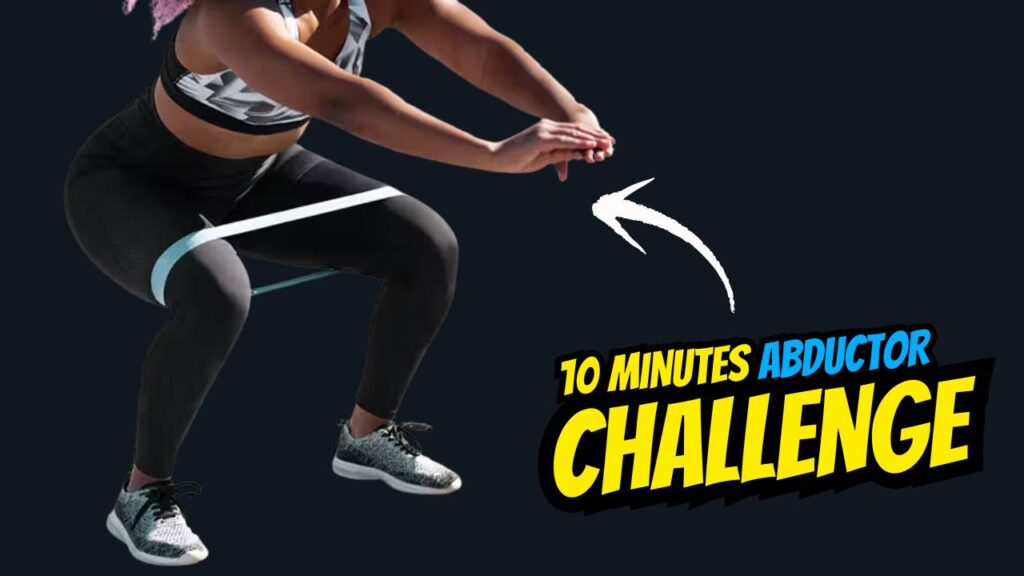
This 10-minute abductor challenge is designed not only to wake up these neglected muscles but also to enhance your athletic performance, stabilize your gait, and reduce your risk of injuries.
Whether you’re an athlete, a desk worker, or just someone looking to move better and feel stronger, this quick routine can bring measurable benefits in a short time.

Table of Contents
What Are Hip Abductors and Why Do They Matter?
Your hip abductors include the gluteus medius, gluteus minimus, and tensor fasciae latae. These muscles are responsible for moving your leg away from your body (abduction) and are critical for lateral movement, pelvic stability, and injury prevention.
When these muscles are weak or underactive:
- Your knees may collapse inward during squats or lunges.
- You’re more prone to ankle sprains.
- Your walking and running efficiency drops.
- You may suffer from hip or lower back pain due to overcompensation.
Do’s & Don’ts of the 10-Minute Abductor Challenge
| Do | Don’t |
|---|---|
| Warm up your hips and legs before starting the routine | Jump straight into the challenge with cold muscles |
| Focus on slow, controlled movements for maximum muscle activation | Rush through reps with poor form |
| Keep your core engaged to support balance and posture | Let your lower back or hips sag during movements |
| Use resistance bands for added intensity once you’re comfortable | Start with high resistance if you’re new to abductor training |
| Breathe steadily — exhale during the lift, inhale during the return | Hold your breath during reps |
| Perform the challenge consistently (3–5x per week) for best results | Expect instant results from just one or two sessions |
| Stretch and cool down after each workout to aid recovery | Skip the cooldown — this increases the chance of tightness and soreness |
| Listen to your body and modify moves if you feel discomfort | Push through sharp pain or joint discomfort |
The 10-Minute Abductor Challenge: Boost Strength, Balance & Stability
This focused challenge includes five highly effective abductor exercises you can do with just your bodyweight or resistance bands.
Aim for 45 seconds of work and 15 seconds of rest for each move, and repeat the circuit twice.
1. Side-Lying Leg Raises
How to:
- Lie on your side with your legs extended straight.
- Lift the top leg as high as you can while keeping your hips stacked.
- Lower it slowly and repeat.
Benefits:
- Directly targets the gluteus medius.
- Builds hip stability and balance.
Tip: Keep your core engaged to avoid leaning backward or forward.
2. Standing Band Abductions
How to:
- Loop a resistance band around your ankles.
- Stand tall and slowly lift one leg out to the side, resisting the band.
- Return with control. Repeat on the other leg.
Benefits:
- Strengthens stabilizers in both the standing and moving leg.
- Mimics real-life movement like walking and side stepping.
Fact: Abduction with resistance helps retrain neuromuscular coordination — key for injury prevention.
3. Side Plank with Leg Lift
How to:
- Get into a side plank position on your elbow.
- Raise your top leg while keeping your core tight and hips lifted.
- Lower and repeat.
Benefits:
- Builds core, shoulder, and hip strength simultaneously.
- Improves lateral chain endurance and pelvic stability.
Myth Buster: Many believe side planks are only for the obliques — but they’re actually one of the best abductor strengtheners too.
4. Clamshells (with or without resistance band)
How to:
- Lie on your side, knees bent at 90 degrees.
- Keep your feet touching and open your knees like a clamshell.
- Lower and repeat.
Benefits:
- Isolates the gluteus medius and minimus.
- Corrects movement dysfunction in hips and knees.
Pro Tip: Place a mini resistance band just above the knees for increased difficulty.
5. Lateral Band Walks
How to:
- Place a resistance band around your thighs or ankles.
- Lower into a half-squat.
- Step sideways with control, keeping constant band tension.
Benefits:
- Activates the entire abductor chain and glutes.
- Enhances coordination and muscle endurance.
Did You Know? This is a favorite warm-up for elite athletes before sprinting or jumping because of how quickly it activates dormant hip muscles.
Post-Challenge Cool Down (2 Minutes)
Finish your session with light stretching:
- Seated Figure-4 Stretch: Opens hips and stretches outer glutes.
- Side-Lying Hip Flexor Stretch: Targets the front and side hip area.
What Happens After 30 Days of This 10-Minute Routine?
| Transformation Area | What You Can Expect |
|---|---|
| Balance & Stability | Noticeably better control in walking, running, and squats. |
| Glute Activation | Firmer, more lifted glutes due to consistent stimulation. |
| Injury Prevention | Reduced ankle rolls and knee aches from stronger stabilizers. |
| Pelvic & Postural Alignment | Improved standing posture and pelvic symmetry. |
| Mobility & Comfort | Less tightness in hips, easier side movements. |
Recovery & Care Tips After the Abductor Challenge
Supporting your body with proper recovery is just as important as the workout itself. Here’s how to help your abductors recover, rebuild, and perform at their best:
1. Cool Down Right After the Workout
Always follow your abductor session with a light cooldown to reduce muscle tightness and encourage flexibility. Focus on:
- Seated figure-4 stretch (30 seconds each leg)
- Standing side lunge hold
- Hip circles or gentle mobility drills
2. Prioritize Sleep & Hydration
Muscles repair during deep sleep. Aim for 7–9 hours of quality rest, especially on training days. Also, hydrate adequately — water helps flush out toxins and supports nutrient delivery to muscles.
3. Use a Foam Roller or Massage Ball
Foam rolling the outer thighs, glutes, and hip area can relieve soreness and improve blood flow. Spend 1–2 minutes per side, focusing on any tight or tender spots.
4. Don’t Skip Active Recovery
Engaging in light activities like walking, swimming, or yoga on your off days promotes circulation and keeps your muscles mobile without overloading them.
5. Fuel with Recovery-Friendly Nutrition
Your muscles need protein and anti-inflammatory nutrients to rebuild. Include:
- Lean proteins (chicken, fish, legumes)
- Healthy fats (avocados, nuts)
- Colorful vegetables and fruits for antioxidants
6. Apply Heat or Cold Wisely
- Cold therapy (like ice packs) helps reduce inflammation if soreness feels sharp or swollen.
- Heat therapy (like warm compresses or baths) improves circulation and eases muscle stiffness.
7. Listen to Your Body
If your abductors feel tight or painful, scale back your intensity, reduce resistance, or take an extra rest day. Overworking can lead to strains or fatigue.
8. Stretch Regularly Outside of Workouts
Incorporate abductor and hip-opening stretches into your daily routine, especially if you sit for long hours. This maintains flexibility and prevents imbalances.
Final Thoughts
Strengthening your abductors might not be as glamorous as smashing through heavy squats, but it’s one of the smartest things you can do for your body’s long-term health. These small but mighty muscles are foundational — they affect everything from your stride to your squat.
Give this 10-minute abductor challenge a consistent place in your weekly routine, and your body will thank you in the form of better stability, smoother movement, and fewer injuries.
Stay consistent. Stay strong. And don’t overlook the muscles that keep everything aligned.
Frequently Asked Questions (FAQs)
Can I do the 10-minute abductor challenge every day?
Yes, you can perform this challenge daily, especially if you’re using bodyweight only. However, if you’re using resistance bands or feel muscle fatigue, aim for 3–5 times per week to allow proper recovery.
Do I need equipment for this routine?
No equipment is necessary, but adding resistance bands can enhance muscle activation and results. They’re optional but highly recommended as you progress.
How long will it take to see results?
Many people begin to notice improvements in balance, glute activation, and reduced hip tightness within 2–3 weeks if done consistently.
Will this routine help with knee or lower back pain?
Yes, strengthening the abductors can support better knee alignment and pelvic stability, which may relieve knee and lower back discomfort caused by muscle imbalances.
Can beginners do this challenge?
Absolutely. Each movement is beginner-friendly and can be adjusted in intensity. Start slow and focus on proper form before adding resistance.
Is this challenge only for women?
Not at all. Abductor strength is crucial for everyone, regardless of gender — especially for athletes, runners, and anyone looking to improve joint stability.
What if I feel sore after the workout?
Mild soreness is normal and indicates muscle engagement. If it’s too intense, reduce the number of reps or sessions per week and include light stretching post-workout.
Will this routine help grow my glutes?
While it targets the side glutes (gluteus medius and minimus), it contributes to overall glute shape and firmness, especially when combined with other glute-focused exercises.
Can I combine this with my existing workout plan?
Yes. This 10-minute challenge is perfect as a warm-up, finisher, or standalone session on rest days. It complements most strength, cardio, or mobility programs.
What’s the difference between abductors and adductors?
Abductors move your legs away from your body (side to side), while adductors bring them inward. Both are essential for joint health and balanced muscle development.


